Reliable electricity transforms a basic campsite into a comfortable and functional outdoor base. Modern portable solar equipment makes it possible to run lights, charge devices, and support small appliances far from traditional power sources. Setting up a solar camp power station may sound technical, but the process becomes straightforward when broken into clear steps. A thoughtful setup also protects equipment from weather and wear, extending its lifespan over many trips. In this article, practical steps will show how to build a dependable solar-powered camping setup from start to finish.

1. Choose Your Solar Panel and Power Station
Match Panel Wattage to Your Power Station’s Input
Solar panels and power stations must be compatible to charge efficiently and safely. Each power station has a maximum solar input rating, which limits how much energy it can accept at one time. Choosing panels with a combined wattage close to, but not greatly exceeding, that limit ensures faster charging without stressing the system. For example, a medium-size station designed for 200 watts of input will charge slowly with a small panel but may not gain extra speed from panels far above its limit. Checking voltage ranges is equally important, because mismatched voltage can prevent charging altogether.
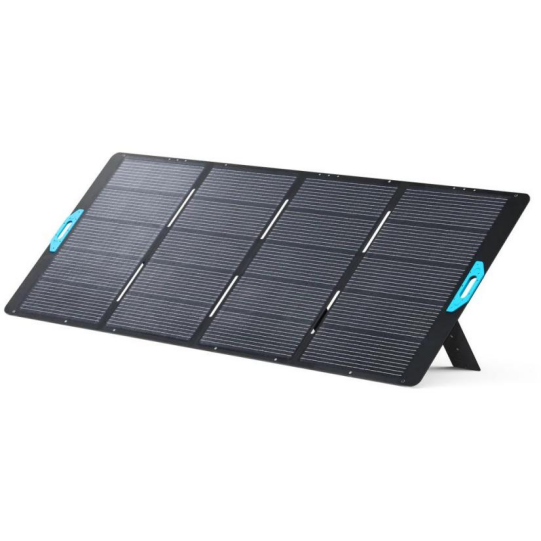
Pick Foldable Panels for Portability or Rigid for High Output
Panel style affects both convenience and energy production during a trip. Foldable panels are easier to carry, store in a vehicle, and reposition throughout the day as sunlight shifts. Rigid panels, while bulkier, often deliver more stable performance in windy conditions and can be mounted for semi-permanent setups. Campers who move locations frequently often prefer lightweight folding designs that deploy in minutes beside a tent or picnic table. Options such as Anker SOLIX camping solar panels balance portability with solid efficiency, making them suitable for short trips or longer off-grid stays. Choosing between these formats depends on travel style, storage space, and how much power is needed daily.
2. Find the Perfect Sunny Spot
Set Up in Direct Sunlight, Away from Shade
Location plays a major role in how much energy solar panels can produce. Even partial shade from trees, tents, or vehicles can significantly reduce output, especially if shadows cross only part of a panel. An open area with uninterrupted sunlight for most of the day provides the best performance. Observing the campsite for a few minutes before setting up helps identify how shadows move during different hours. Placing panels several feet away from high-traffic areas also reduces the risk of accidental damage. A careful placement decision at the start of the day often results in noticeably higher energy collection.
Angle Panels Toward the Sun for Maximum Charge
Panel angle influences how directly sunlight strikes the surface, which affects charging speed. When sunlight hits panels at a steep angle, less energy is absorbed and more is reflected away. Tilting panels so they face the sun more directly increases efficiency without any additional equipment. Adjustable stands or built-in kickstands make it easier to change angles as the sun moves across the sky. Repositioning panels once or twice a day can noticeably boost total energy gathered. Small adjustments over several hours often provide enough extra power to run devices longer into the evening.
3. Connect and Start Charging
Use the Correct Cable to Link Panel to Power Station
Proper connections ensure energy flows safely from panels to the power station. Most solar panels use standardized connectors that attach to an adapter cable provided with the station. Using the manufacturer-recommended cable helps avoid loose fits or overheating during high input periods. Before plugging in, checking that connectors are clean and dry prevents corrosion and poor contact. Cables should be laid out to avoid sharp bends, heavy foot traffic, or tension that could damage internal wiring.
Turn On the Power Station and Monitor the Solar Input
After connecting the panels, the power station should be powered on to begin accepting solar input. Many stations display real-time wattage, making it easy to confirm that panels are producing energy. If the input reading is unexpectedly low, repositioning the panels or checking cable connections often resolves the issue. Monitoring input during the first few minutes ensures everything is working before leaving the setup unattended. Periodic checks during the day help track how changing sunlight affects performance.
4. Plug In Your Camp Gear
Power Lights, Fans, and Small Appliances via AC Outlets
Once stored energy begins to build, essential camp gear can be powered directly from the station. LED lights use very little electricity and can run for many hours, making them ideal for tents and cooking areas. Small fans improve comfort during warm weather while still drawing modest power compared to larger appliances. Compact kitchen devices, such as electric kettles or small cookers, can also be used briefly when the battery level is healthy. Checking each device’s wattage rating ensures it stays within the station’s output limits. Spacing out high-power uses prevents rapid battery drain and keeps energy available for nighttime needs.
Charge Phones, Cameras, and Drones via USB Ports
USB ports provide an efficient way to recharge personal electronics without using larger AC outlets. Phones, tablets, headlamps, and GPS units typically charge quickly through these low-power connections. Charging during daylight hours when solar input is active reduces the load on the battery later at night. Keeping cables organized in one area of the campsite helps avoid misplacing important devices. Rotating devices onto the charger as others reach full battery ensures everyone stays powered. Consistent daytime charging habits support smoother energy management throughout the trip.
5. Manage Power and Store for Night
Monitor Battery Level and Recharge as Needed
Watching the battery level helps balance daytime use with overnight needs. Many power stations display remaining capacity as a percentage, making it easier to estimate how long devices can run. If levels drop faster than expected, reducing appliance use or improving panel positioning can help recover energy. Sunny afternoons are the best time to top off the battery before evening. Planning heavier energy use, such as cooking or boiling water, during strong sunlight reduces nighttime strain. Steady monitoring prevents sudden shutdowns after dark.
Disconnect and Safely Store Gear During Bad Weather
Weather changes can affect both performance and equipment safety. Strong winds may tip panels, while heavy rain can strain connectors and cables if not properly protected. Temporarily disconnecting panels during severe conditions helps prevent damage to both the panels and the power station. Storing equipment under a tarp, inside a vehicle, or in a tent vestibule adds an extra layer of protection. Once conditions improve, panels can be redeployed and re-angled toward the sun. Careful weather awareness extends the life of solar gear over many camping seasons.
Conclusion
Setting up a solar camp power station involves thoughtful equipment choices, smart placement, and steady energy management. Matching panels to a power station, positioning them in strong sunlight, and using correct connections all contribute to efficient charging. Daily habits such as adjusting panel angles and monitoring battery levels make a noticeable difference in available power. A well-managed system supports lighting, communication devices, and small comforts without constant concern about running out of energy. Proper storage and weather precautions further protect the investment in solar equipment. With the right setup and routine, solar power can reliably support comfortable and extended camping adventures.